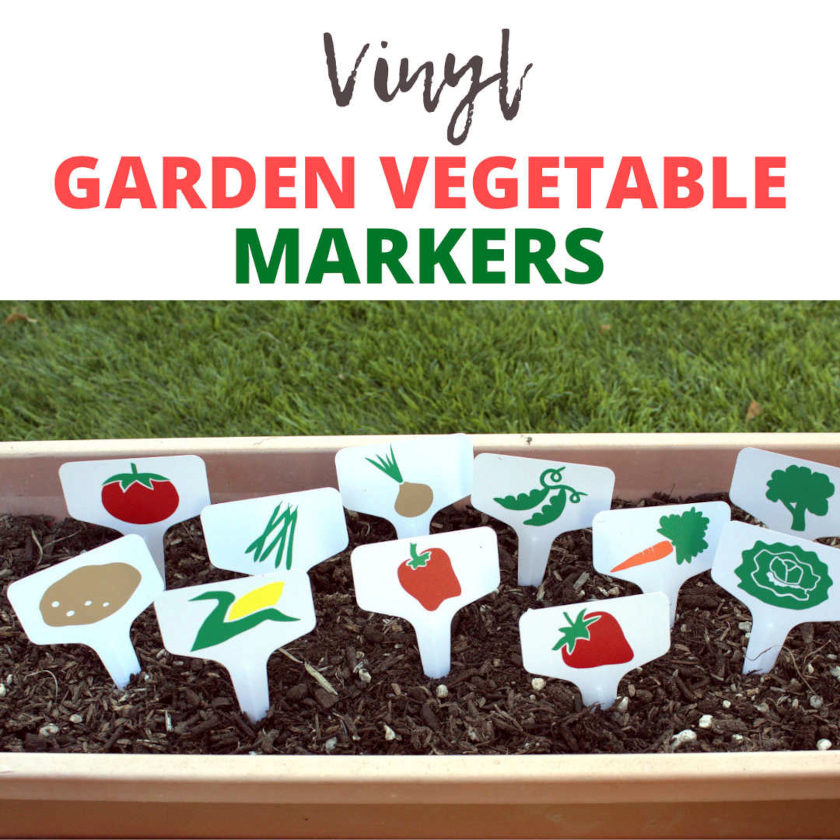
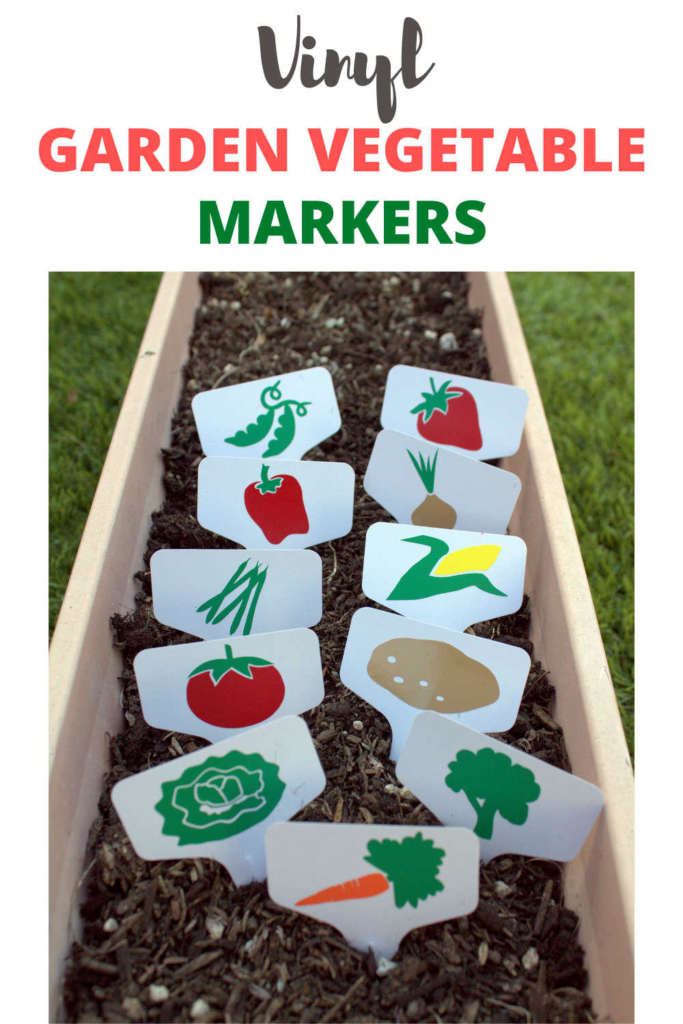
Summer is right around corner and I’m busy planting my garden. There is something so satisfying about working the soil and putting seeds in the ground. And it’s even better when those seeds grow into something that you can eat. Growing a garden is a labor of love. Adding these vinyl garden vegetable markers is a sweet touch to show off what you have growing. Quick and easy to put together, they also make a great gift for a garden-loving friend!
Along with making crafts, my kids also love to join me in the garden. There are so many great lessons to learn by growing fruits and vegetables – patience, knowledge about where their food comes from, good work ethic, did I mention patience? Plus, growing their own veggies is a GREAT way to get kids to actually EAT them.
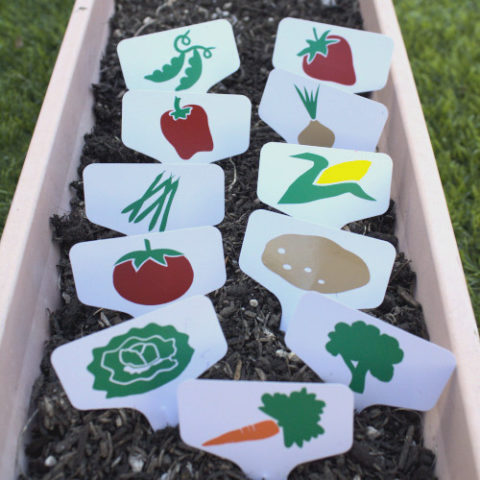
I always use vegetable markers once we get our seeds in the ground, because, let’s face it, none of us have the memory capacity that we think we do. As much as I’d like to think I’ll always remember what I planted where, there is no way I actually will remember. Typically, you write the name of the plant on a simple plastic vegetable marker, however, my youngest can’t read. This sparked an idea. Why not use pictures instead? These vinyl garden vegetable markers solve that. Plus, they are so much cuter than my chicken scratches.
These vinyl garden vegetable markers aren’t just for kids, though. Have a garden-loving friend or mom? Add a pair of cute garden gloves and these would make a thoughtful gift. Or perhaps you should just make them for yourself to show off in your own garden.
My favorite part about these vegetable markers is that they can be easily made from small vinyl scraps you have laying around and they are assembled in a matter of minutes. For the markers themselves, I found these plastic vegetable markers on Amazon, but you can use any square or rectangular markers of your choice. Just make sure to measure your marker and adjust the size of the designs to make sure they fit before you cut.
I also recommend you use permanent vinyl for this application, as the markers are meant to be used outside, and therefore, are subject to the elements. You can use matte or glossy vinyl. I actually made mine with a mixture of the two since that’s what I had in my scrap vinyl. The colors I used are green, red, orange, yellow, and dark beige. Feel free to change it up and use other colors or go monochromatic. It’s up to you and your creativity!
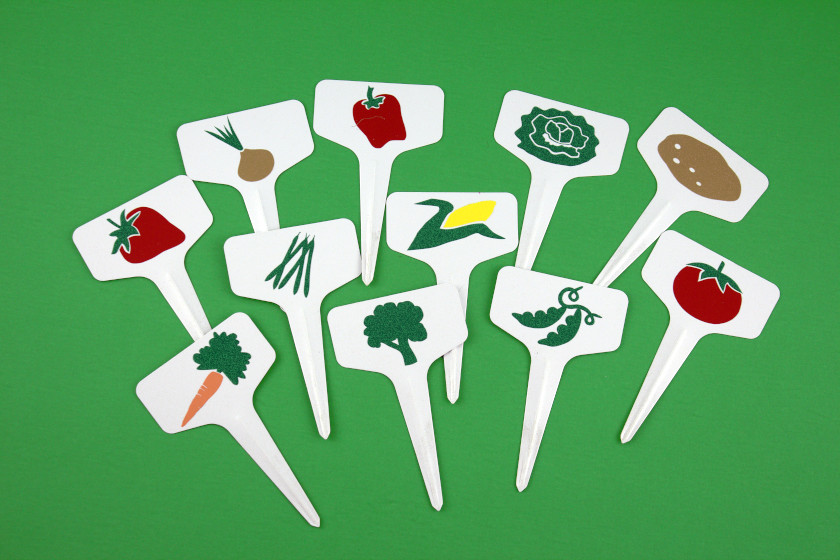
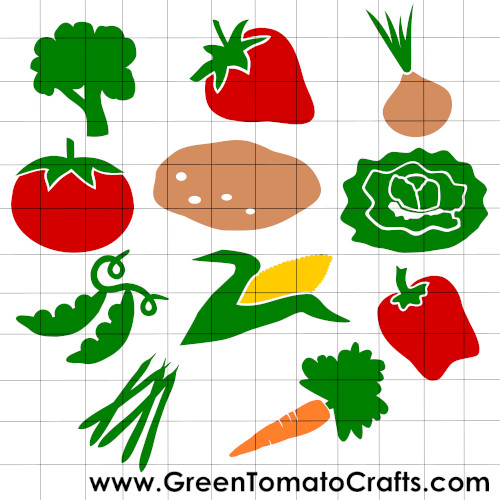
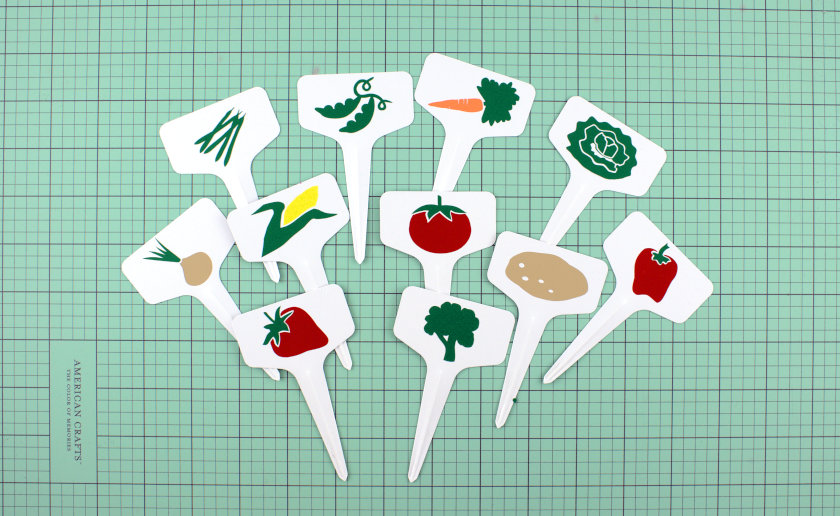
I designed the following fruits/vegetables for my cut files as these seem to be the most popular for home vegetable growers:
- Bell pepper
- Broccoli
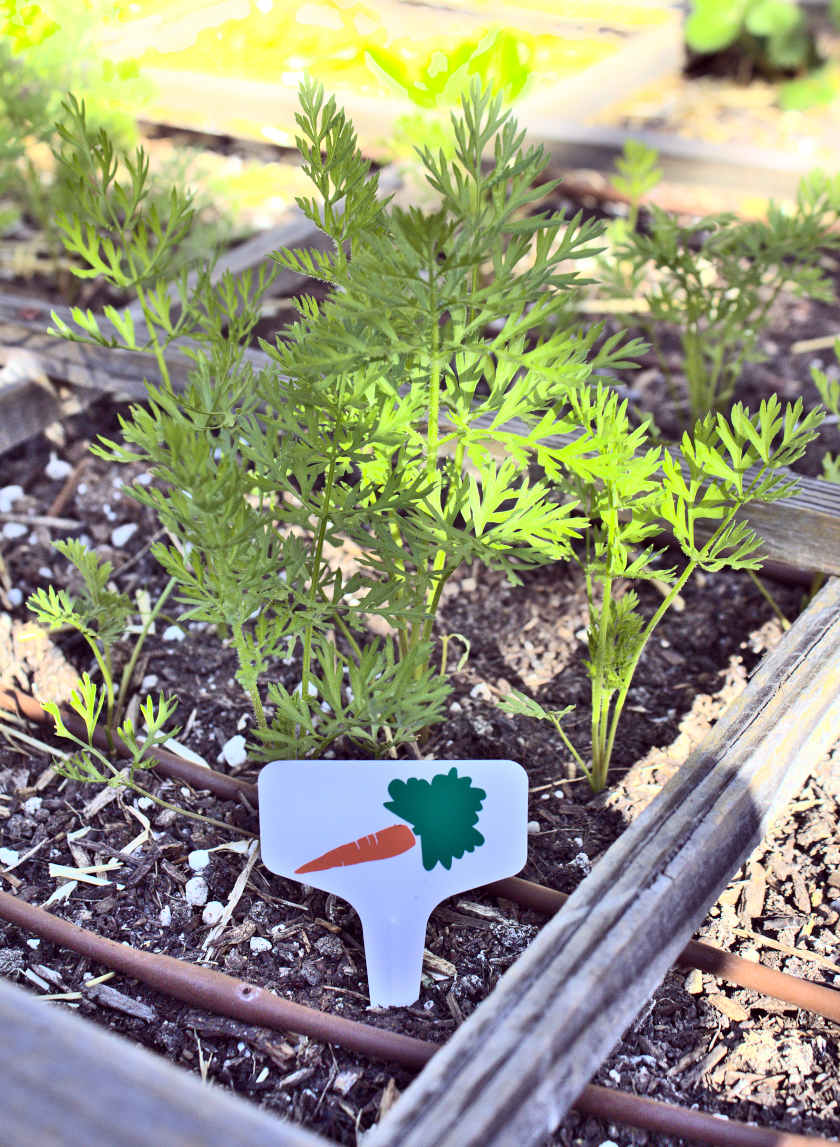
- Carrot
- Corn
- Green beans
- Lettuce
- Onion
- Peas
- Potato
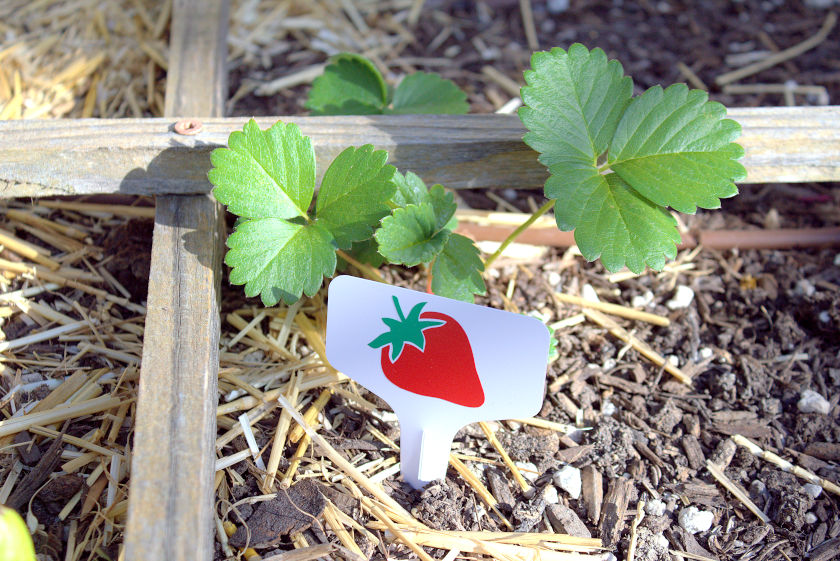
- Strawberry
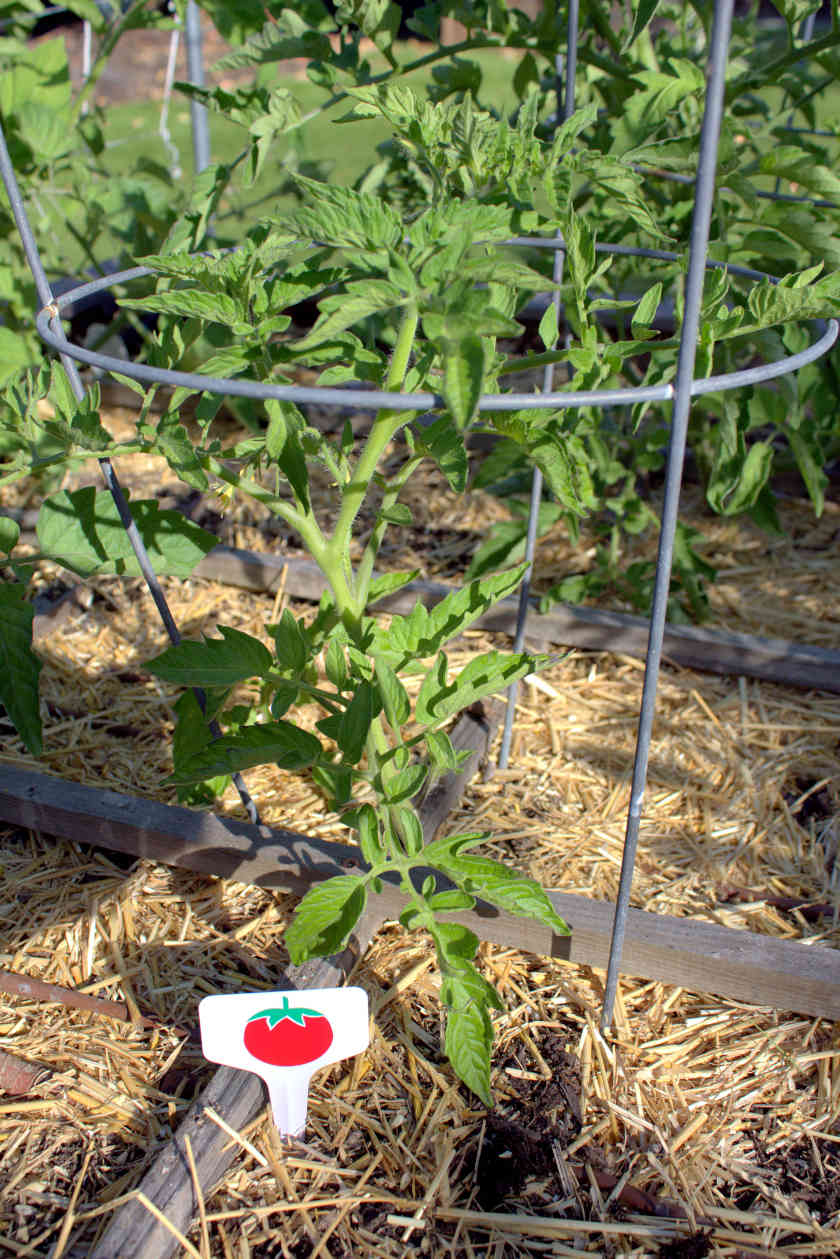
- Tomato
Did I forget your favorite? I’d love to hear from you. Please send me a message and let me know! I may add it to the collection.
My free file included in my resource library has all the designs you see here to make vinyl vegetable markers for the vegetables listed above. You can pick and choose which ones you need, or go crazy and plant ALL THE THINGS!
WHAT YOU NEED:
- Vegetable Markers (like the ones here)
- Adhesive Vinyl (I recommend permanent vinyl)
- Cricut cutting machine (or other cutting machine)
- Weeding tool
- Scraper tool
- Transfer tape
- Light grip mat
- Design #1 Garden Vegetable Markers (available in my Free Resource Library – get the password by completing the form at the bottom of the page)
HOW TO MAKE IT:
- Measure your surface
Check the dimensions of your vegetable marker. The ones I purchased are just over 2.25 inches wide by 1.25 inches tall and my design is sized to fit this. ALWAYS check the measurements first, to be sure that it will fit!

- Get the file
You can get my free vegetable markers file in my Resource Library. Included in the file are 11 vegetable designs made to fit a standard vegetable marker 2.25 inches wide by 1.25 inches tall.
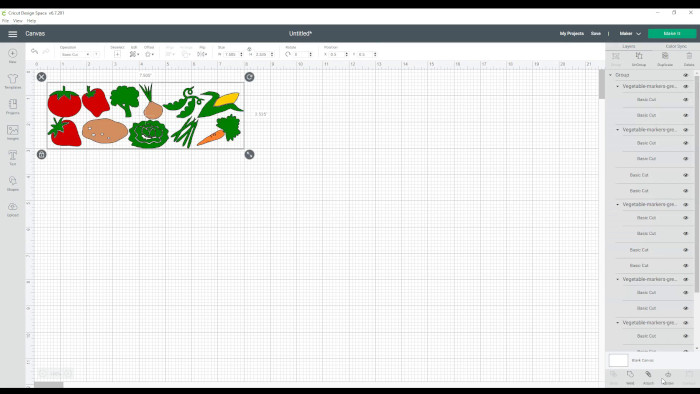
- Prepare the file for cutting
Upload the file to Cricut Design Space (or other design software). All 11 styles will be in a single file. Hide or delete any you do not wish to cut. Double check the size of each design to make sure it will fit the marker of your choice and adjust sizing accordingly.*
- Cut
Using the light grip mat, place your adhesive vinyl face up on the mat. Click “Make it” in Design space and choose premium vinyl. Load your prepared mat into the machine and follow the prompts.
- Weed the designs
Using your weeding tool, remove the excess vinyl around the cut design. Be patient – sometimes it can be tricky to get a hold of the vinyl with the tool. With many of these designs, you can also pinch the corner and use your fingernail to get between the vinyl and the backing and peel off the outer piece.
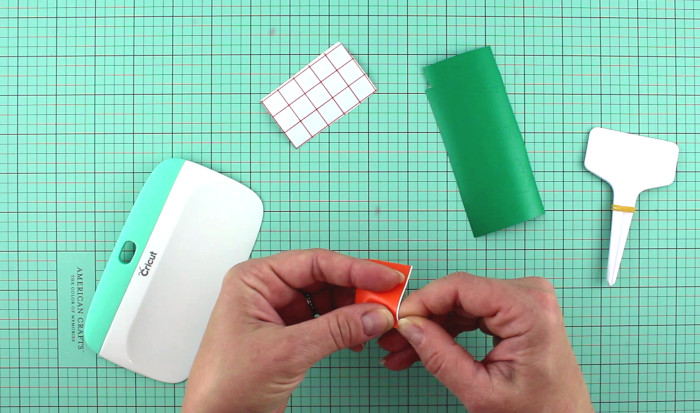

- Transfer the designs
Cut a piece of transfer tape the same size as the ENTIRE design. If the design has 2 parts, make sure your transfer tape can accommodate BOTH parts.
Remove the backing from the transfer tape and apply to the design. Use your scraping tool to smooth the transfer tape onto the design. Make sure to use pressure so that your design sticks to the tape. Once the design is on the transfer tape, remove the backing from the vinyl and repeat with additional parts if necessary.
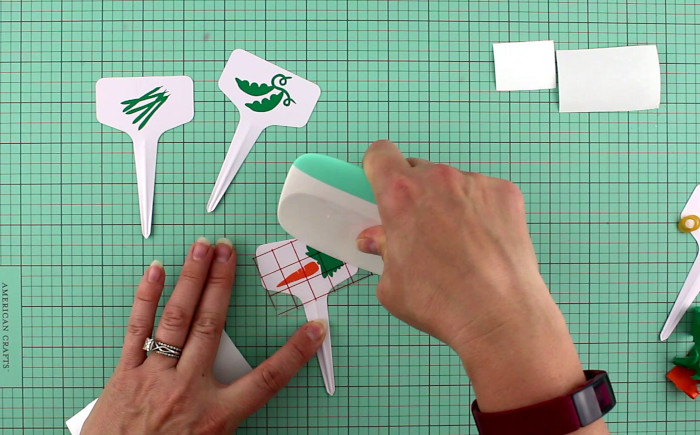
Position the design on the marker and carefully press it down. Use your scraping tool to adhere the vinyl to the marker and gently remove the transfer tape. If any vinyl still sticks to the transfer tape, press down again and scrape again, making sure to use plenty of pressure.
That’s it! Now you just need to place them in your garden bed and wait for those delicious vegetables to grow.
*I test all my files by uploading the SVG’s to Cricut Design space and cutting them with a Cricut Maker machine. This is done on a PC. Sometimes, things upload differently into Design Space on different devices, so always be sure to double check the sizing, and resize accordingly. I also upload the included DXF file to Silhouette Studio to check the sizing and layers, however, I do not test cutting with a Silhouette machine.
Vinyl Garden Vegetable Markers
Easy to make and assemble with scrap adhesive vinyl, these will add a special flair to your garden beds or make a fun and unique gift
Materials
- Garden Vegetable Markers
- Adhesive Vinyl (I recommend permanent)
- Transfer tape
- Design #1 Vinyl Garden Vegetable Markers
Tools
- Cricut cutting machine (or other similar cutting machine)
- Light grip mat
- Weeding tool
- Scraping tool
Instructions
- 1. Measure the surface of your marker. The design is made to fit markers that are 2.25x1.25 inches. ALWAYS check the measurement first to be sure it will fit!
- 2. Get the file. You can get my free vegetable markers file in my Resource Library. Included in the file are 11 vegetable designs made to fit a standard vegetable marker 2.25 inches wide by 1.25 inches tall.
- 3. Prepare the file for cutting. Upload the file to Cricut Design Space (or other design software). All 11 styles will be in a single file. Hide or delete any you do not wish to cut. Double check the size of each design to make sure it will fit the marker of your choice and adjust sizing accordingly. *See Note
- 4. Cut. Place adhesive vinyl face up on the mat and cut design using the fine point blade.
- 5. Weed the designs. Using your weeding tool, remove excess vinyl from around each design.
- 6. Transfer the design. Cut a piece of transfer tape the same size as the ENTIRE design. If the design has 2 parts, make sure your transfer tape can accommodate BOTH parts. Remove the backing from the transfer tape and apply to the design. Use your scraping tool to smooth the transfer tape onto the design. Once the design is on the transfer tape, remove the backing from the vinyl and repeat with additional parts if necessary.
- Position the design on the marker and carefully press it down. Use your scraping tool to adhere the vinyl to the marker and gently remove the transfer tape. If any vinyl still sticks to the transfer tape, press down again and scrape again, making sure to use plenty of pressure.
Notes
*I test all my files by uploading the SVG’s to Cricut Design space and cutting them with a Cricut Maker machine. This is done on a PC. Sometimes things upload differently into Design Space on different devices, so always be sure to double check the sizing, and resize accordingly. I also upload the included DXF file to Silhouette Studio to check the sizing and layers, however, I do not test cutting with a Silhouette machine.
WANT TO SAVE THIS FOR LATER? CLICK HERE TO SAVE TO PINTEREST!
I’d love to see how you use these! Drop me a line at hello@greentomatocrafts.com or tag on social media with #greentomatocrafts.
Have anything you’d love to make or learn? Contact Me! I’d love to hear from you!

Leave a Reply